
I realised that I needed new sunglasses when wearing my existing pair didn’t actually enable me able to see the world any better. True, they blocked out the glare, but they were so scratched that in dappled light they rendered me virtually blind. This seemed not ideal.
Mindful about where to source a new (to me) purchase from, I took a £2.99 risk and ordered a pair from Oxfam’s online shop. I’ve had previous successes from there and I’m pleased to report the sunglasses have not ruined my track record. They fit perfectly, are in great condition, and fulfil that all important role of protecting my eyes and sight on sunny days.
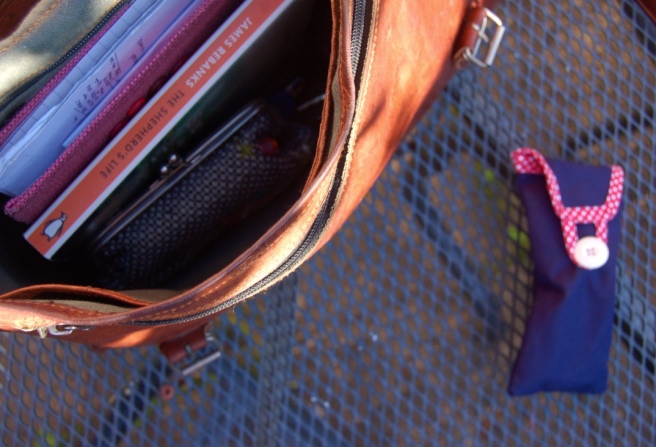
I take full responsibility for the demise of my old pair. The arms, hinges, frame were all fine. The problem were the scratches inflicted from having to compete at the bottom of my handbag with keys, phone, book, purse, notebook, four functioning pens, one finished pen I keep forgetting to remove…. Part of sustainable living is getting the most life out of each item. With my previous sunglasses I was remiss in this. Keen to fix it, I opted to sew a sunglasses case from leftover sewing materials.

Materials used:
Fabric for the case (I opted for a sturdier cotton to help with the whole ‘competing with stuff loose at the bottom of my bag’ issue)
Bias binding for the raw edges
A button
Matching thread
What I did:
- Design: figuring this out before starting to cut seemed a pretty reasonable idea. I wanted cut and sew as few pieces as possible. To give the sunglasses extra protection, I wanted the opening to be covered by a flap secured shut by a loop and a button. A buttonhole and button could work just as well.
- Cut the fabric: I measured the length and width of the sunglasses (accounting for the distance the lenses sit away from the arms). I added half an inch for seam allowance. I opted to cut on a fold of the fabric to save time (less fabric to cut and one fewer seam to sew). Measuring the width along the fold, I cut along both seams of the length. For one half of the fabric, I then cut straight across between the two long seams. For the other, I cut both long seams another couple of inches longer, before cutting straight across, to create the flap.
- Sew the sides together: I sewed the right sides together up to the flap on both sides to create an open-ended pouch. I used a zigzag stitch to minimise the fraying from the raw edges on the seams. Turning the fabric the right way out, I used a knitting needle to push the corners out fully.
- Sew the flap: I cut the corners of the flap to give it more of a tapered look. I top-stitched bias binding (friend of lazy seam sewers!) around the opening to the sunglasses case and the flap to cover all the exposed edges. I needed to tuck the inside seams towards the front of the case to ensure all the exposed edges were caught in the bias binding.
- Attach the loop: I used the same bias binding for the loop, measuring the necessary length before folding it in two and top stitching the two sides together. I then top-stitched the loop to the fold.
- Attach the button: to ensure the button was in the correct place, I popped the sunglasses inside the case and marked where the button should be to hold the flap shut. Hand sewing the button on using thread folded in two halved the time needed to to attach it.
All done. I’m pleased to report they’re fulfilling their role as sunglasses protectors, admirably deterring attacks from keys and other satchel detritus. Ideal.
Today’s soundtrack: Jason Mraz // We Sing. We Dance. We Steal Things.
